W E K A
4.3
4.3
  • WEKA v4.3 documentation
    • Documentation revision history
  • WEKA System Overview
    • WEKA Data Platform introduction
      • WEKA system functionality features
      • Converged WEKA system deployment
      • Optimize redundancy in WEKA deployments
    • SSD capacity management
    • Filesystems, object stores, and filesystem groups
    • WEKA networking
    • Data lifecycle management
    • WEKA client and mount modes
    • WEKA containers architecture overview
    • Glossary
  • Planning and Installation
    • Prerequisites and compatibility
    • WEKA cluster installation on bare metal servers
      • Plan the WEKA system hardware requirements
      • Obtain the WEKA installation packages
      • Install the WEKA cluster using the WMS with WSA
      • Install the WEKA cluster using the WSA
      • Manually install OS and WEKA on servers
      • Manually prepare the system for WEKA configuration
        • Broadcom adapter setup for WEKA system
        • Enable the SR-IOV
      • Configure the WEKA cluster using the WEKA Configurator
      • Manually configure the WEKA cluster using the resource generator
      • Perform post-configuration procedures
      • Add clients to an on-premises WEKA cluster
    • WEKA Cloud Deployment Manager Web (CDM Web) User Guide
    • WEKA Cloud Deployment Manager Local (CDM Local) User Guide
    • WEKA installation on AWS
      • WEKA installation on AWS using Terraform
        • Terraform-AWS-WEKA module description
        • Deployment on AWS using Terraform
        • Required services and supported regions
        • Supported EC2 instance types using Terraform
        • WEKA cluster auto-scaling in AWS
        • Detailed deployment tutorial: WEKA on AWS using Terraform
      • WEKA installation on AWS using the Cloud Formation
        • Self-service portal
        • CloudFormation template generator
        • Deployment types
        • AWS Outposts deployment
        • Supported EC2 instance types using Cloud Formation
        • Add clients to a WEKA cluster on AWS
        • Auto scaling group
        • Troubleshooting
      • Install SMB on AWS
    • WEKA installation on Azure
    • WEKA installation on GCP
      • WEKA project description
      • GCP-WEKA deployment Terraform package description
      • Deployment on GCP using Terraform
      • Required services and supported regions
      • Supported machine types and storage
      • Auto-scale instances in GCP
      • Add clients to a WEKA cluster on GCP
      • Troubleshooting
      • Detailed deployment tutorial: WEKA on GCP using Terraform
      • Google Kubernetes Engine and WEKA over POSIX deployment
  • Getting Started with WEKA
    • Manage the system using the WEKA GUI
    • Manage the system using the WEKA CLI
      • WEKA CLI hierarchy
      • CLI reference guide
    • Run first IOs with WEKA filesystem
    • Getting started with WEKA REST API
    • WEKA REST API and equivalent CLI commands
  • Performance
    • WEKA performance tests
      • Test environment details
  • WEKA Filesystems & Object Stores
    • Manage object stores
      • Manage object stores using the GUI
      • Manage object stores using the CLI
    • Manage filesystem groups
      • Manage filesystem groups using the GUI
      • Manage filesystem groups using the CLI
    • Manage filesystems
      • Manage filesystems using the GUI
      • Manage filesystems using the CLI
    • Attach or detach object store buckets
      • Attach or detach object store bucket using the GUI
      • Attach or detach object store buckets using the CLI
    • Advanced data lifecycle management
      • Advanced time-based policies for data storage location
      • Data management in tiered filesystems
      • Transition between tiered and SSD-only filesystems
      • Manual fetch and release of data
    • Mount filesystems
      • Mount filesystems from Single Client to Multiple Clusters (SCMC)
    • Snapshots
      • Manage snapshots using the GUI
      • Manage snapshots using the CLI
    • Snap-To-Object
      • Manage Snap-To-Object using the GUI
      • Manage Snap-To-Object using the CLI
    • Quota management
      • Manage quotas using the GUI
      • Manage quotas using the CLI
  • Additional Protocols
    • Additional protocol containers
    • Manage the NFS protocol
      • Supported NFS client mount parameters
      • Manage NFS networking using the GUI
      • Manage NFS networking using the CLI
    • Manage the S3 protocol
      • S3 cluster management
        • Manage the S3 service using the GUI
        • Manage the S3 service using the CLI
      • S3 buckets management
        • Manage S3 buckets using the GUI
        • Manage S3 buckets using the CLI
      • S3 users and authentication
        • Manage S3 users and authentication using the CLI
        • Manage S3 service accounts using the CLI
      • S3 rules information lifecycle management (ILM)
        • Manage S3 lifecycle rules using the GUI
        • Manage S3 lifecycle rules using the CLI
      • Audit S3 APIs
        • Configure audit webhook using the GUI
        • Configure audit webhook using the CLI
        • Example: How to use Splunk to audit S3
      • S3 supported APIs and limitations
      • S3 examples using boto3
      • Access S3 using AWS CLI
    • Manage the SMB protocol
      • Manage SMB using the GUI
      • Manage SMB using the CLI
  • Operation Guide
    • Alerts
      • Manage alerts using the GUI
      • Manage alerts using the CLI
      • List of alerts and corrective actions
    • Events
      • Manage events using the GUI
      • Manage events using the CLI
      • List of events
    • Statistics
      • Manage statistics using the GUI
      • Manage statistics using the CLI
      • List of statistics
    • Insights
    • System congestion
    • Security management
      • Obtain authentication tokens
      • KMS management
        • Manage KMS using the GUI
        • Manage KMS using the CLI
      • TLS certificate management
        • Manage the TLS certificate using the GUI
        • Manage the TLS certificate using the CLI
      • CA certificate management
        • Manage the CA certificate using the GUI
        • Manage the CA certificate using the CLI
      • Account lockout threshold policy management
        • Manage the account lockout threshold policy using GUI
        • Manage the account lockout threshold policy using CLI
      • Manage the login banner
        • Manage the login banner using the GUI
        • Manage the login banner using the CLI
      • Manage Cross-Origin Resource Sharing
    • User management
      • Manage users using the GUI
      • Manage users using the CLI
    • Organizations management
      • Manage organizations using the GUI
      • Manage organizations using the CLI
      • Mount authentication for organization filesystems
    • Expand and shrink cluster resources
      • Add a backend server
      • Expand specific resources of a container
      • Shrink a cluster
    • Background tasks
      • Set up a Data Services container for background tasks
      • Manage background tasks using the GUI
      • Manage background tasks using the CLI
    • Upgrade WEKA versions
  • Licensing
    • License overview
    • Classic license
  • Monitor the WEKA Cluster
    • Deploy monitoring tools using the WEKA Management Station (WMS)
    • WEKA Home - The WEKA support cloud
      • Local WEKA Home overview
      • Deploy Local WEKA Home v3.0 or higher
      • Deploy Local WEKA Home v2.x
      • Explore cluster insights and statistics
      • Manage alerts and integrations
      • Enforce security and compliance
      • Optimize support and data management
    • Set up the WEKAmon external monitoring
    • Set up the SnapTool external snapshots manager
  • Support
    • Get support for your WEKA system
    • Diagnostics management
      • Traces management
        • Manage traces using the GUI
        • Manage traces using the CLI
      • Protocols debug level management
        • Manage protocols debug level using the GUI
        • Manage protocols debug level using the CLI
      • Diagnostics data management
  • Best Practice Guides
    • WEKA and Slurm integration
      • Avoid conflicting CPU allocations
    • Storage expansion best practice
  • WEKApod
    • WEKApod Data Platform Appliance overview
    • WEKApod servers overview
    • Rack installation
    • WEKApod initial system setup and configuration
    • WEKApod support process
  • Appendices
    • WEKA CSI Plugin
      • Deployment
      • Storage class configurations
      • Tailor your storage class configuration with mount options
      • Dynamic and static provisioning
      • Launch an application using WEKA as the POD's storage
      • Add SELinux support
      • NFS transport failback
      • Upgrade legacy persistent volumes for capacity enforcement
      • Troubleshooting
    • Convert cluster to multi-container backend
    • Create a client image
    • Update WMS and WSA
    • BIOS tool
Powered by GitBook
On this page
  • Before you begin
  • Prerequisites
  • Workflow
  • 1. Configure a WEKA cluster with the WEKA Configurator
  • 2. Apply the configuration
  • What to do next?
  1. Planning and Installation
  2. WEKA cluster installation on bare metal servers

Configure the WEKA cluster using the WEKA Configurator

Detailed workflow for WEKA cluster installation in a multi-container backend architecture using the WEKA Configurator.

The WEKA Configurator tool facilitates cluster configuration. It performs the following:

  • Scans your environment to detect the network, verifies various attributes such as hostnames, and discovers components such as gateway routers.

  • Selects the servers that can be included in the cluster and verifies that all servers run the same WEKA version.

  • Guides you through the configuration options.

  • Generates a valid configuration file that you can apply to form a WEKA cluster from a group of servers.

Before you begin

Adhere to the following concepts:

  • STEM mode: STEM mode is the initial state before configuration. The term STEM comes from the concept of stem cells in biology, which are undifferentiated. In WEKA clusters, STEM mode carries the same connotation of being an undifferentiated state.

  • Reference host: The wekaconfig normally runs on one of the servers designated as part of the final cluster. The server that wekaconfig runs on is called the reference host. When wekaconfig runs, it expects to find a group of servers in STEM mode. If the reference host is not in STEM mode, an error message is issued, and the program terminates.

  • Same networks: It is assumed that all other servers forming the cluster are connected to the same networks as the reference host and have the same configuration (all servers have a homogeneous hardware configuration).

  • Homogeneous configuration: Two or more servers with the same core count, RAM size, number and size of drives, and network configurations are considered homogeneous.

    • It is best practice to create the WEKA cluster from a group of homogeneous servers (it is typically the case because the hardware is typically purchased all at the same time). wekaconfig checks if the servers are homogeneous; if they are not, it points out the discrepancies (such as varying numbers of drives, RAM, or cores).

    • wekaconfig allows the configuration of heterogeneous clusters. However, because most times, the servers are supposed to be homogeneous, it can be an error that they are not. For example, if one of the drives is defective (DOA) from the factory or a memory stick is defective. These hardware issues are uncommon and can be difficult to discover in large clusters.

  • Passwordless ssh connection: Enabling passwordless ssh between all the servers is very convenient and makes most tools work more smoothly. At a minimum, a regular user with passwordless sudo privileges and passwordless ssh is required for configuration. However, it is most convenient to have the root user has passwordless ssh, even if only temporarily during configuration. Ensure you can ssh without a password by doing an ssh to each server.

  • Stripe width: A RAID-like concept refers to the total width of the data stripe for data protection mechanisms. Typically, the DATA and PARITY combined are the stripe width. In WEKA terms, the stripe width must be less than the total number of servers in the cluster. For example, in a 10-server cluster, the stripe width can be 9 (7 data + 2 parity) plus 1 spare.

Prerequisites

Workflow

  1. Configure a WEKA cluster with the WEKA Configurator.

  2. Apply the configuration (config.sh).

1. Configure a WEKA cluster with the WEKA Configurator

  1. Download the WEKA’s tools repository to one of the servers by running the following: git clone https://github.com/weka/tools

  2. Connect to the server using ssh, change the directory to tools/install, and run ./wekaconfig.

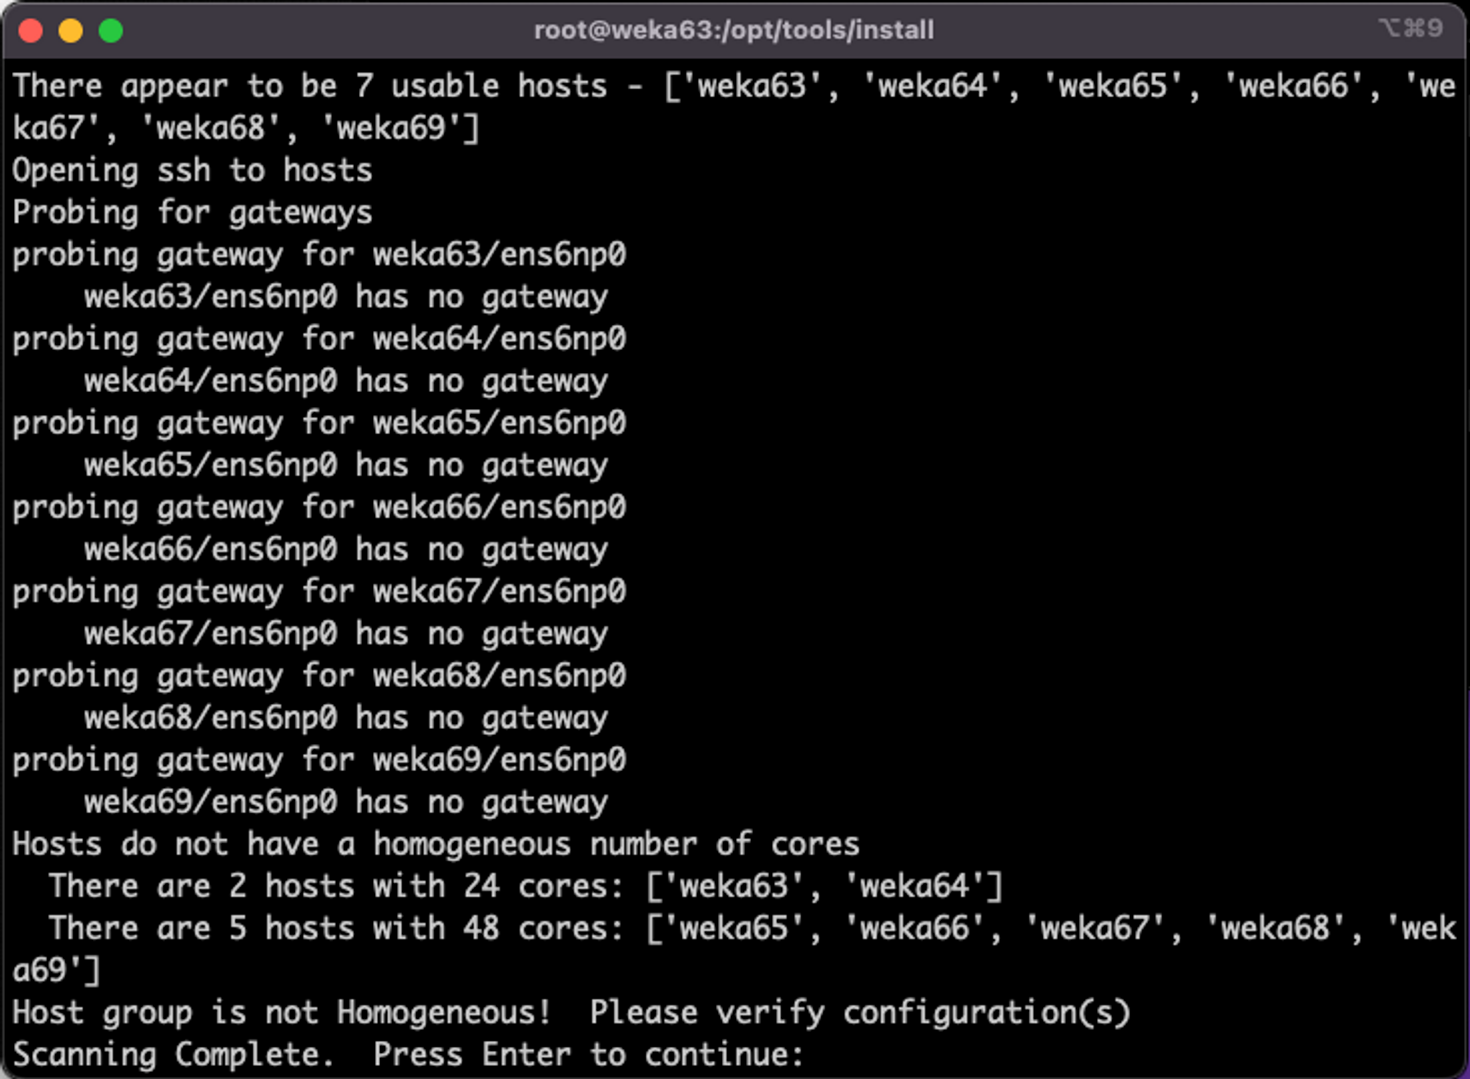
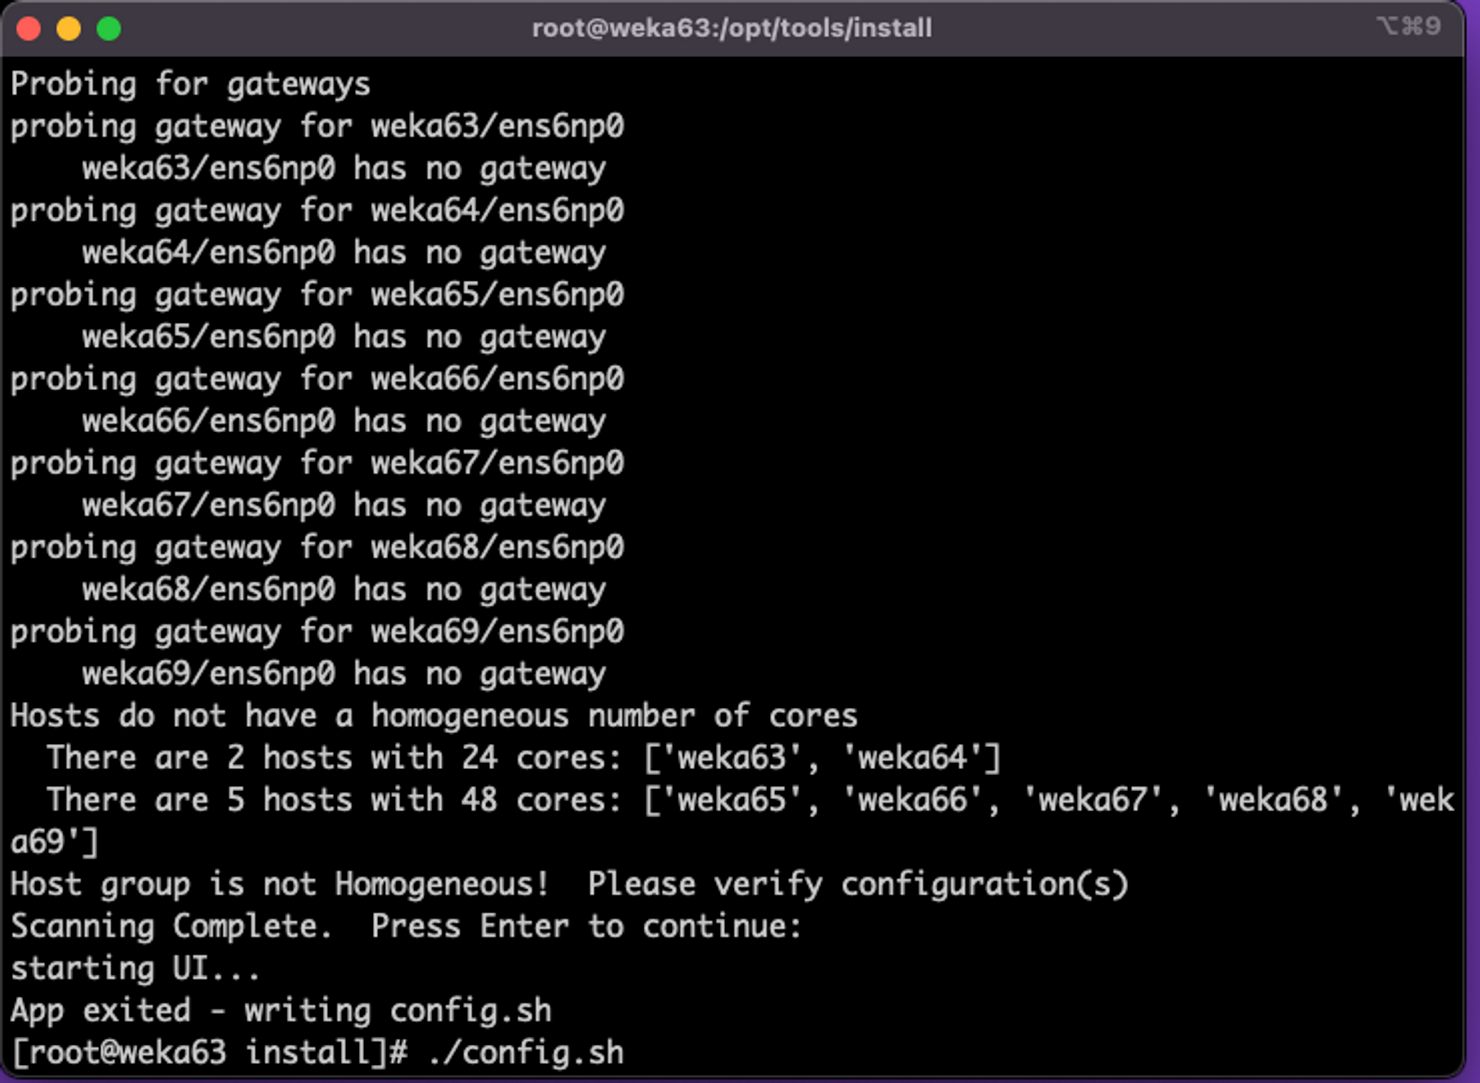
The wekaconfig scans the environment, detects the servers, and determines if the group of servers is homogeneous. The following example shows the servers do not have a homogeneous number of cores.
  1. Review the detection results. If the configuration meets your requirements, press Enter. Select each of the following tabs to set the WEKA configuration.

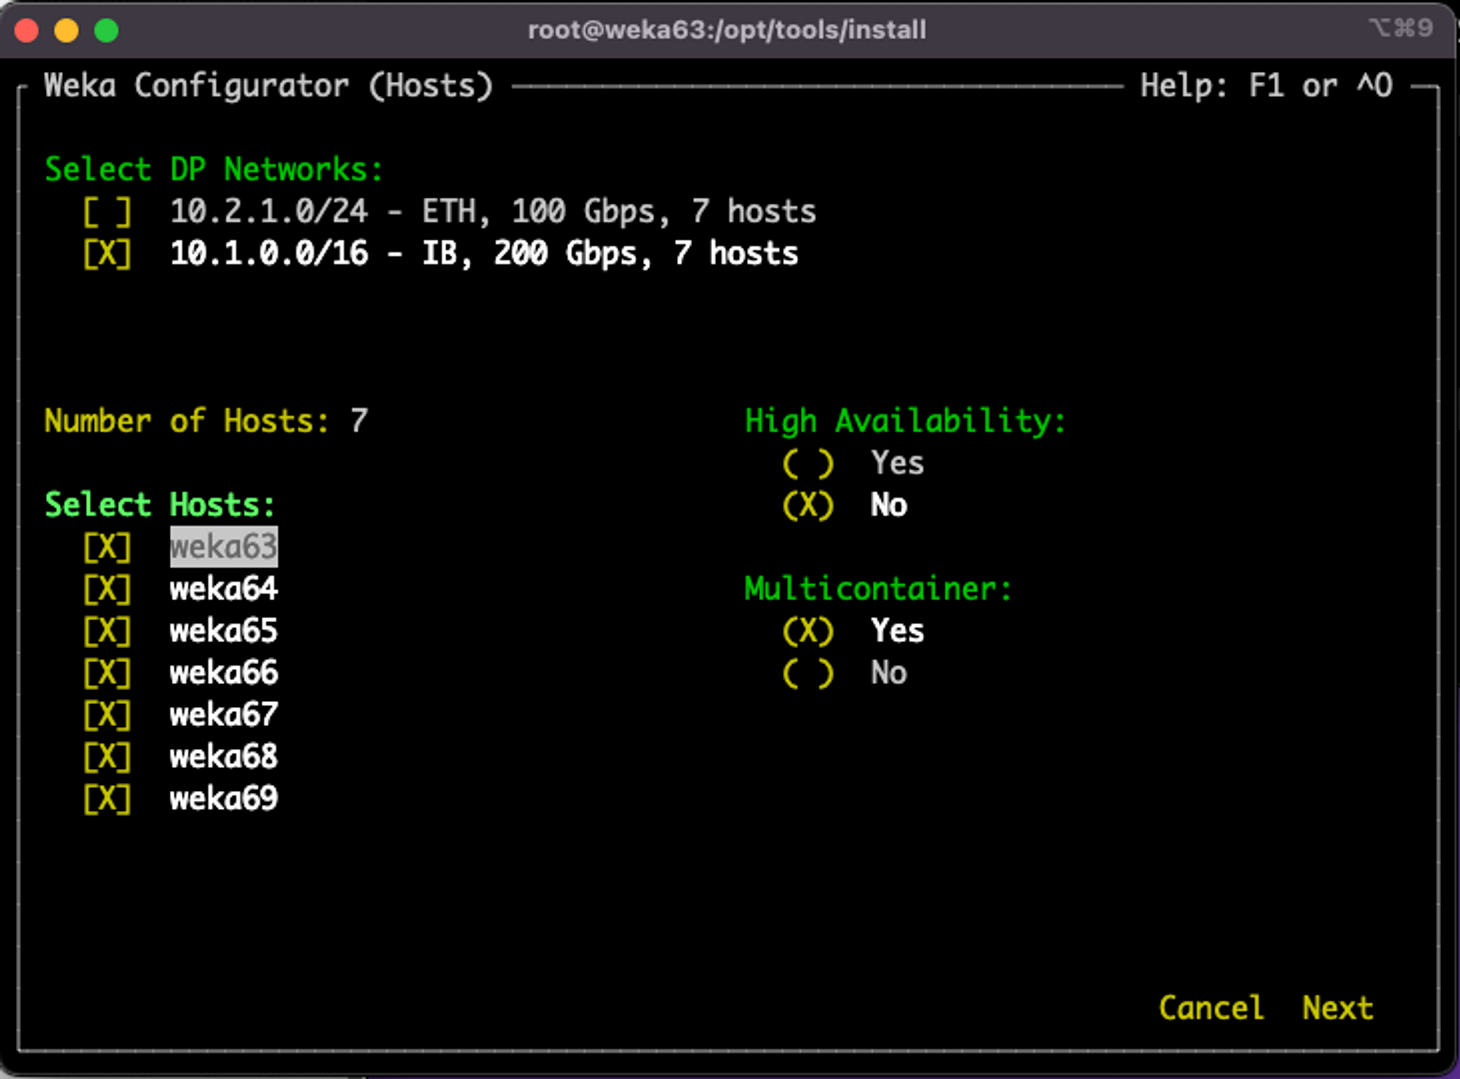
The wekaconfig displays the data plane networks (DP Networks) detected previously. The list under Select DP Networks reflects the high-speed (100Gb+) networks used for the WEKA storage traffic.

Verify that the list of networks, speed, and number of detected hosts are correct.

If the values are not as expected, such as an incorrect number of servers, incorrect or missing networks, investigate it and check the messages. Typically, network configuration issues are the source of the problem.

Select the required networks to configure WEKA POSIX protocol to run on.

Use the arrow and Tab keys to move between the fields and sections, and the space-bar to select the value.

Note: The green labels have entry fields. The yellow labels have read-only fields.
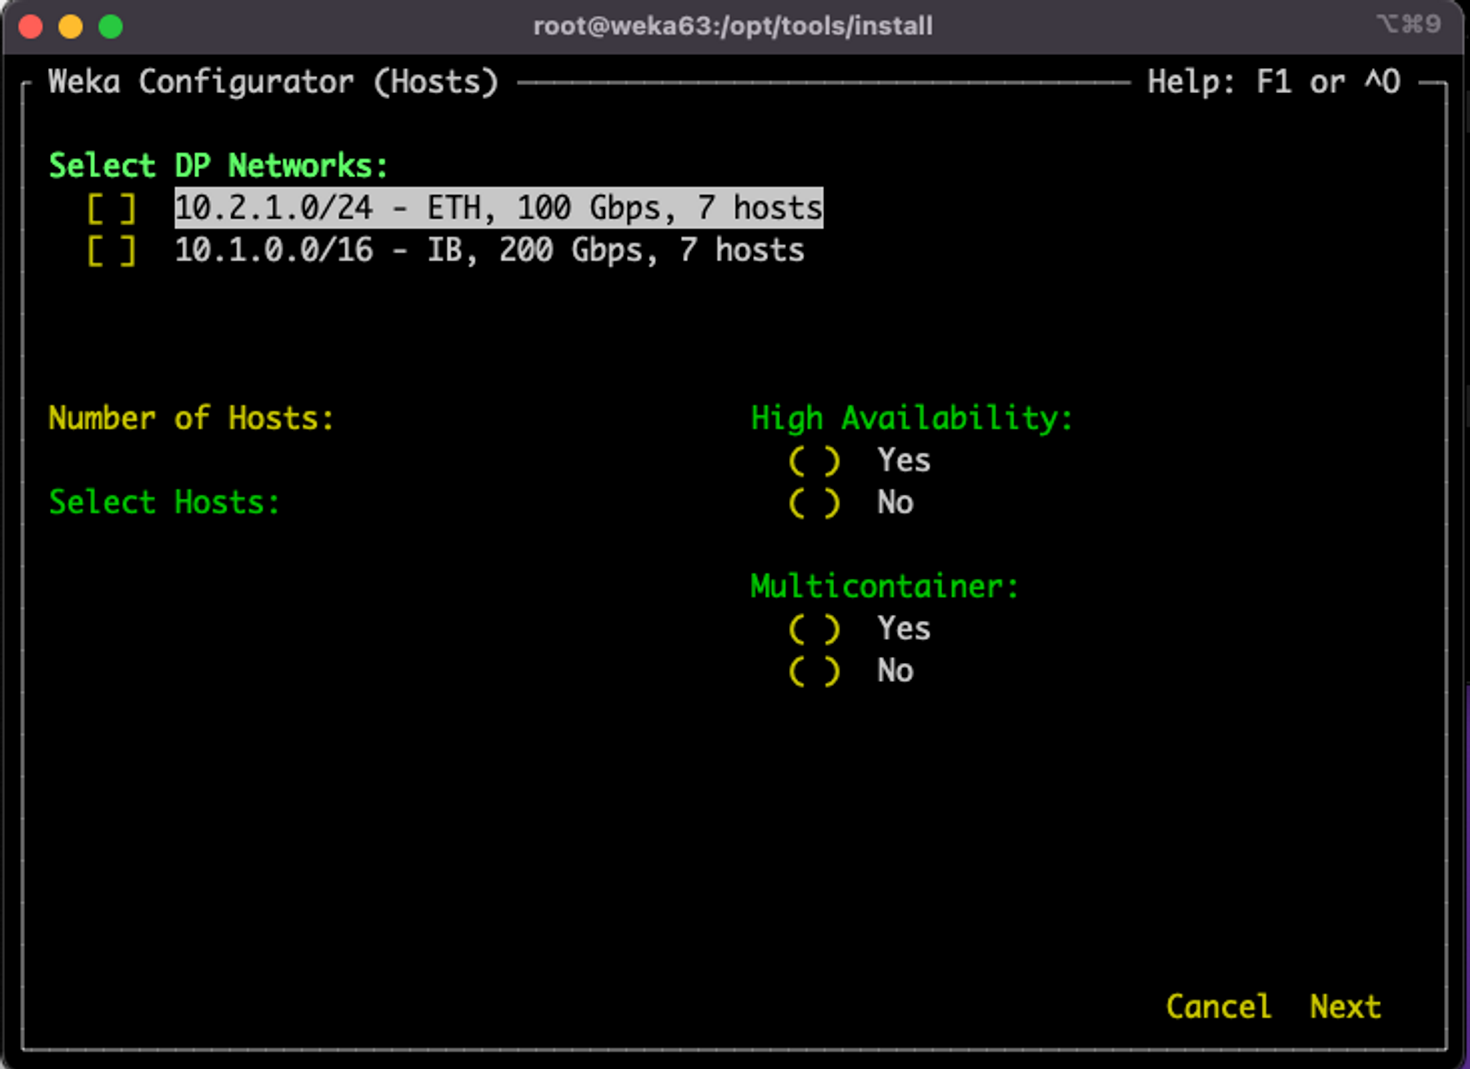
Press Tab to move to the Hosts section.

wekaconfig pre-populated the hostnames of the servers that are on this network and running the same version of WEKA and are in STEM mode.

Use the arrow keys to move between the servers, and space bar to select or deselect specific servers. Press Tab to accept values and move to the next field: High Availability.

High Availability (HA) is used for networks with more than one network interface.

In this example, only one network is selected, so the HA default is No. When there are two or more networks selected, you can change the the HA option to suit your needs. Consult the WEKA Customer Success Team before changing this default value.

Press Tab to accept value and move to the next field: Multicontainer. The default is Yes and it is mandatory from WEKA version 4.1.

Press Tab to move to the lower-right. Use the arrow to move to Next. Then, press the space-bar.
This page shows the following sections:

  • Host Configuration Reference

  • Bias

  • Cores details

Host Configuration Reference

This section shows the reference host cores and drives configuration, and the total number of hosts (servers).

Bias

The Bias options determine the optimal CPU core and memory allocation scheme.

  • Enable Protocols: If you intend to use the cluster for NFS, SMB, or S3 protocols, select this option. This option reserves some CPU and memory for the protocols.

  • Protocols are Primary: If you intend to use the cluster primarily or heavily with NFS, SMB, or S3 protocols, select this option. It reserves more CPU and memory (then in the first option) for the protocols .

  • DRIVES over COMPUTE: In high-core-count configurations (48+ cores), the standard algorithm for determining optimal core allocations may reduce the drive:core ratio in favor of additional COMPUTE cores. This bias setting favors a DRIVE core allocation of 1:1 (if possible) over additional COMPUTE cores. For advice on core allocations, consult with the Customer Success Team if you are configuring high-core-count systems.

Core details

wekaconfig suggests a reasonable set of core allocations (FE/COMPUTE/DRIVES) depending on your selections. You may override these values as needed.

  • Cores for OS: The number of cores reserved for the OS (fixed at 2).

  • Cores for Protocols: The number of cores reserved for protocols. It depends on the selected Bias option.

  • Usable Weka Cores: The number of cores can be used for FE, COMPTE, and DRIVES processes.

  • Used Weka Cores: The number of cores selected for use as FE, COMPUTE, or DRIVES cores.

The Usable Weka Cores and Available Weka Cores read-only fields are updated as you make changes so you can ensure you are not exceeding the number of available cores as you change any values. This is an advanced feature, and core allocation must not be changed without consulting the Customer Success Team.
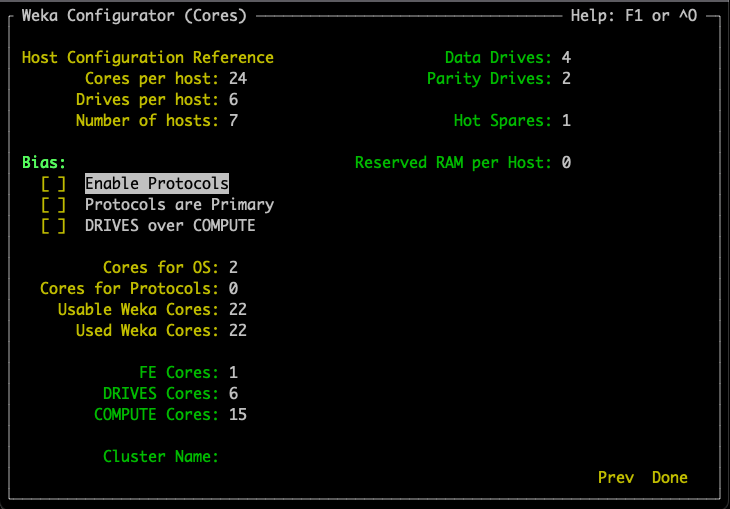
Move to the Cluster Name field and set a unique name for your WEKA cluster.
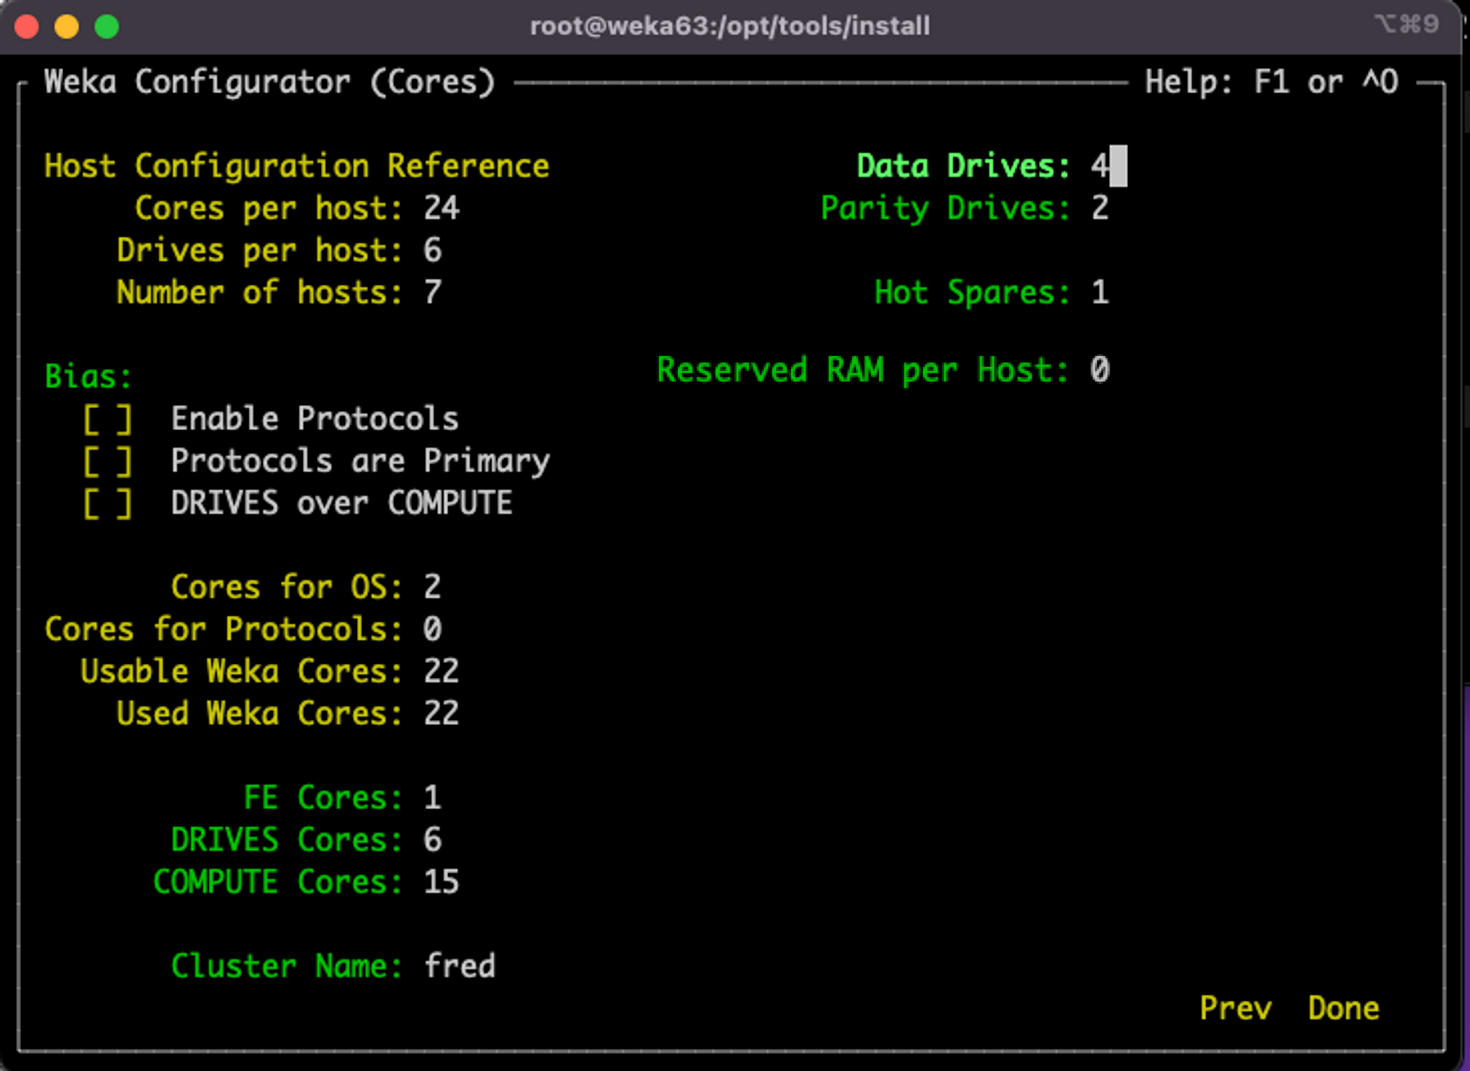
The stripe and other settings include:

  • Data Drives: The number of data members in the Stripe Width.

  • Parity Drives: The number of parity members.

  • Hot Spares: The number of Hot Spare members.

  • Reserved RAM per Host: Extra RAM in GB reserved on each host for various purposes, like supporting Protocols or Applications.

These settings are in terms of servers, not SSDs. WEKA stripes over the entire servers, not over individual drives. For more details, see Manually configure the WEKA cluster using the resource generator.

The following example shows a stripe width of 6 (4+2) on 7 servers, and one hot spare.
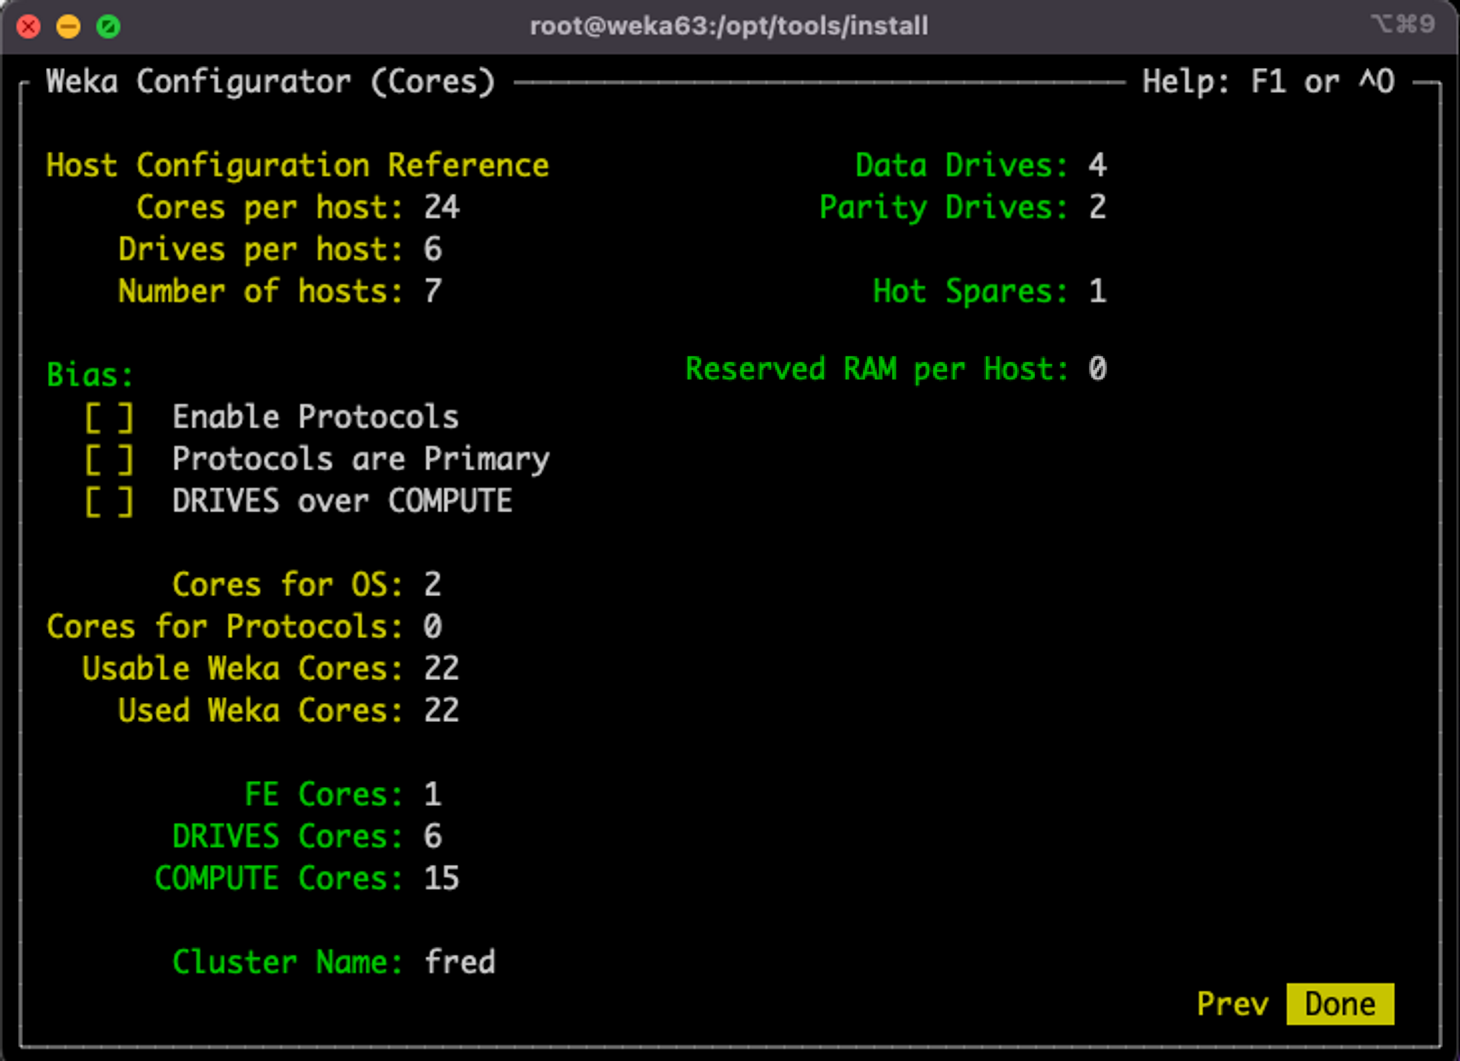
Once you have set the WEKA configuration, using the arrows, select Done and press Enter. The wekaconfig creates the config.sh file.

config.sh output example
#!/bin/bash

usage() {
	echo "Usage: $0 [--no-parallel]"
	echo "  Use --no-parallel to prevent parallel execution"
	exit 1
}

para() {
	TF=$1; shift
	echo $*
	$* &
	#[ !$TF ] && { echo para waiting; wait; }
	[ $TF == "FALSE" ] && { echo para waiting; wait; }
}

PARA="TRUE"

# parse args
if [ $# != 0 ]; then
	if [ $# != 1 ]; then
		usage
	elif [ $1 == "--no-parallel" ]; then
		PARA="FALSE"
	else
		echo "Error: unknown command line switch - $1"
		usage
	fi
fi

echo starting - PARA is $PARA

# ------------------ custom script below --------------

echo Stopping weka on weka63
para ${PARA} scp -p ./resources_generator.py weka63:/tmp/
para ${PARA} ssh weka63 "sudo weka local stop; sudo weka local rm -f default"
echo Stopping weka on weka64
para ${PARA} scp -p ./resources_generator.py weka64:/tmp/
para ${PARA} ssh weka64 "sudo weka local stop; sudo weka local rm -f default"
echo Stopping weka on weka65
para ${PARA} scp -p ./resources_generator.py weka65:/tmp/
para ${PARA} ssh weka65 "sudo weka local stop; sudo weka local rm -f default"
echo Stopping weka on weka66
para ${PARA} scp -p ./resources_generator.py weka66:/tmp/
para ${PARA} ssh weka66 "sudo weka local stop; sudo weka local rm -f default"
echo Stopping weka on weka67
para ${PARA} scp -p ./resources_generator.py weka67:/tmp/
para ${PARA} ssh weka67 "sudo weka local stop; sudo weka local rm -f default"
echo Stopping weka on weka68
para ${PARA} scp -p ./resources_generator.py weka68:/tmp/
para ${PARA} ssh weka68 "sudo weka local stop; sudo weka local rm -f default"
echo Stopping weka on weka69
para ${PARA} scp -p ./resources_generator.py weka69:/tmp/
para ${PARA} ssh weka69 "sudo weka local stop; sudo weka local rm -f default"

wait
echo Running Resources generator on host weka63
para ${PARA} ssh weka63 sudo /tmp/resources_generator.py -f --path /tmp --net ib0/10.1.1.63/16 --compute-dedicated-cores 15 --drive-dedicated-cores 6 --frontend-dedicated-cores 1
echo Running Resources generator on host weka64
para ${PARA} ssh weka64 sudo /tmp/resources_generator.py -f --path /tmp --net ib0/10.1.1.64/16 --compute-dedicated-cores 15 --drive-dedicated-cores 6 --frontend-dedicated-cores 1
echo Running Resources generator on host weka65
para ${PARA} ssh weka65 sudo /tmp/resources_generator.py -f --path /tmp --net ib0/10.1.1.65/16 --compute-dedicated-cores 15 --drive-dedicated-cores 6 --frontend-dedicated-cores 1
echo Running Resources generator on host weka66
para ${PARA} ssh weka66 sudo /tmp/resources_generator.py -f --path /tmp --net ib0/10.1.1.66/16 --compute-dedicated-cores 15 --drive-dedicated-cores 6 --frontend-dedicated-cores 1
echo Running Resources generator on host weka67
para ${PARA} ssh weka67 sudo /tmp/resources_generator.py -f --path /tmp --net ib0/10.1.1.67/16 --compute-dedicated-cores 15 --drive-dedicated-cores 6 --frontend-dedicated-cores 1
echo Running Resources generator on host weka68
para ${PARA} ssh weka68 sudo /tmp/resources_generator.py -f --path /tmp --net ib0/10.1.1.68/16 --compute-dedicated-cores 15 --drive-dedicated-cores 6 --frontend-dedicated-cores 1
echo Running Resources generator on host weka69
para ${PARA} ssh weka69 sudo /tmp/resources_generator.py -f --path /tmp --net ib0/10.1.1.69/16 --compute-dedicated-cores 15 --drive-dedicated-cores 6 --frontend-dedicated-cores 1
wait
echo Starting Drives container on server weka63
para ${PARA} ssh weka63 "sudo weka local setup container --name drives0 --resources-path /tmp/drives0.json"
echo Starting Drives container on server weka64
para ${PARA} ssh weka64 "sudo weka local setup container --name drives0 --resources-path /tmp/drives0.json"
echo Starting Drives container on server weka65
para ${PARA} ssh weka65 "sudo weka local setup container --name drives0 --resources-path /tmp/drives0.json"
echo Starting Drives container on server weka66
para ${PARA} ssh weka66 "sudo weka local setup container --name drives0 --resources-path /tmp/drives0.json"
echo Starting Drives container on server weka67
para ${PARA} ssh weka67 "sudo weka local setup container --name drives0 --resources-path /tmp/drives0.json"
echo Starting Drives container on server weka68
para ${PARA} ssh weka68 "sudo weka local setup container --name drives0 --resources-path /tmp/drives0.json"
echo Starting Drives container on server weka69
para ${PARA} ssh weka69 "sudo weka local setup container --name drives0 --resources-path /tmp/drives0.json"

wait

sudo weka cluster create weka63 weka64 weka65 weka66 weka67 weka68 weka69 --host-ips=10.1.1.63,10.1.1.64,10.1.1.65,10.1.1.66,10.1.1.67,10.1.1.68,10.1.1.69 -T infinite
echo Starting Compute container 0 on host weka63
para ${PARA} ssh weka63 sudo weka local setup container --name compute0 --resources-path /tmp/compute0.json --join-ips=10.1.1.63,10.1.1.64,10.1.1.65,10.1.1.66,10.1.1.67,10.1.1.68,10.1.1.69 --management-ips=10.1.1.63
echo Starting Compute container 0 on host weka64
para ${PARA} ssh weka64 sudo weka local setup container --name compute0 --resources-path /tmp/compute0.json --join-ips=10.1.1.63,10.1.1.64,10.1.1.65,10.1.1.66,10.1.1.67,10.1.1.68,10.1.1.69 --management-ips=10.1.1.64
echo Starting Compute container 0 on host weka65
para ${PARA} ssh weka65 sudo weka local setup container --name compute0 --resources-path /tmp/compute0.json --join-ips=10.1.1.63,10.1.1.64,10.1.1.65,10.1.1.66,10.1.1.67,10.1.1.68,10.1.1.69 --management-ips=10.1.1.65
echo Starting Compute container 0 on host weka66
para ${PARA} ssh weka66 sudo weka local setup container --name compute0 --resources-path /tmp/compute0.json --join-ips=10.1.1.63,10.1.1.64,10.1.1.65,10.1.1.66,10.1.1.67,10.1.1.68,10.1.1.69 --management-ips=10.1.1.66
echo Starting Compute container 0 on host weka67
para ${PARA} ssh weka67 sudo weka local setup container --name compute0 --resources-path /tmp/compute0.json --join-ips=10.1.1.63,10.1.1.64,10.1.1.65,10.1.1.66,10.1.1.67,10.1.1.68,10.1.1.69 --management-ips=10.1.1.67
echo Starting Compute container 0 on host weka68
para ${PARA} ssh weka68 sudo weka local setup container --name compute0 --resources-path /tmp/compute0.json --join-ips=10.1.1.63,10.1.1.64,10.1.1.65,10.1.1.66,10.1.1.67,10.1.1.68,10.1.1.69 --management-ips=10.1.1.68
echo Starting Compute container 0 on host weka69
para ${PARA} ssh weka69 sudo weka local setup container --name compute0 --resources-path /tmp/compute0.json --join-ips=10.1.1.63,10.1.1.64,10.1.1.65,10.1.1.66,10.1.1.67,10.1.1.68,10.1.1.69 --management-ips=10.1.1.69
wait

para ${PARA} sudo weka cluster drive add 0 /dev/nvme0n1 /dev/nvme1n1 /dev/nvme2n1 /dev/nvme3n1 /dev/nvme4n1 /dev/nvme5n1 
para ${PARA} sudo weka cluster drive add 1 /dev/nvme0n1 /dev/nvme1n1 /dev/nvme2n1 /dev/nvme3n1 /dev/nvme4n1 /dev/nvme5n1 
para ${PARA} sudo weka cluster drive add 2 /dev/nvme0n1 /dev/nvme1n1 /dev/nvme2n1 /dev/nvme3n1 /dev/nvme4n1 /dev/nvme5n1 
para ${PARA} sudo weka cluster drive add 3 /dev/nvme0n1 /dev/nvme1n1 /dev/nvme2n1 /dev/nvme3n1 /dev/nvme4n1 /dev/nvme5n1 
para ${PARA} sudo weka cluster drive add 4 /dev/nvme0n1 /dev/nvme1n1 /dev/nvme2n1 /dev/nvme3n1 /dev/nvme4n1 /dev/nvme5n1 
para ${PARA} sudo weka cluster drive add 5 /dev/nvme0n1 /dev/nvme1n1 /dev/nvme2n1 /dev/nvme3n1 /dev/nvme4n1 /dev/nvme5n1 
para ${PARA} sudo weka cluster drive add 6 /dev/nvme0n1 /dev/nvme1n1 /dev/nvme2n1 /dev/nvme3n1 /dev/nvme4n1 /dev/nvme5n1 


wait
sudo weka cluster update --data-drives=4 --parity-drives=2
sudo weka cluster hot-spare 1
sudo weka cluster update --cluster-name=fred

echo Starting Front container on host weka63
para ${PARA} ssh weka63 sudo weka local setup container --name frontend0 --resources-path /tmp/frontend0.json --join-ips=10.1.1.63,10.1.1.64,10.1.1.65,10.1.1.66,10.1.1.67,10.1.1.68,10.1.1.69 --management-ips=10.1.1.63
echo Starting Front container on host weka64
para ${PARA} ssh weka64 sudo weka local setup container --name frontend0 --resources-path /tmp/frontend0.json --join-ips=10.1.1.63,10.1.1.64,10.1.1.65,10.1.1.66,10.1.1.67,10.1.1.68,10.1.1.69 --management-ips=10.1.1.64
echo Starting Front container on host weka65
para ${PARA} ssh weka65 sudo weka local setup container --name frontend0 --resources-path /tmp/frontend0.json --join-ips=10.1.1.63,10.1.1.64,10.1.1.65,10.1.1.66,10.1.1.67,10.1.1.68,10.1.1.69 --management-ips=10.1.1.65
echo Starting Front container on host weka66
para ${PARA} ssh weka66 sudo weka local setup container --name frontend0 --resources-path /tmp/frontend0.json --join-ips=10.1.1.63,10.1.1.64,10.1.1.65,10.1.1.66,10.1.1.67,10.1.1.68,10.1.1.69 --management-ips=10.1.1.66
echo Starting Front container on host weka67
para ${PARA} ssh weka67 sudo weka local setup container --name frontend0 --resources-path /tmp/frontend0.json --join-ips=10.1.1.63,10.1.1.64,10.1.1.65,10.1.1.66,10.1.1.67,10.1.1.68,10.1.1.69 --management-ips=10.1.1.67
echo Starting Front container on host weka68
para ${PARA} ssh weka68 sudo weka local setup container --name frontend0 --resources-path /tmp/frontend0.json --join-ips=10.1.1.63,10.1.1.64,10.1.1.65,10.1.1.66,10.1.1.67,10.1.1.68,10.1.1.69 --management-ips=10.1.1.68
echo Starting Front container on host weka69
para ${PARA} ssh weka69 sudo weka local setup container --name frontend0 --resources-path /tmp/frontend0.json --join-ips=10.1.1.63,10.1.1.64,10.1.1.65,10.1.1.66,10.1.1.67,10.1.1.68,10.1.1.69 --management-ips=10.1.1.69

wait
echo Configuration process complete

Advanced users can edit the config.sh using vim or nano (or any text editor) to further customize the configuration. If editing is necessary, consult the Customer Success Team.

Regarding the drive selection, it is not possible to select the data drives (NVMe SSD) to include in the configuration. WEKA clusters are typically dedicated to running WEKA services and homogeneous, therefore wekaconfig includes all NVMe drives that are over about 1.5 GB in size (typical). To change the drives used in the cluster, edit the config.sh (see theconfig.sh output example above).

2. Apply the configuration

From the install directory, run ./config.sh.
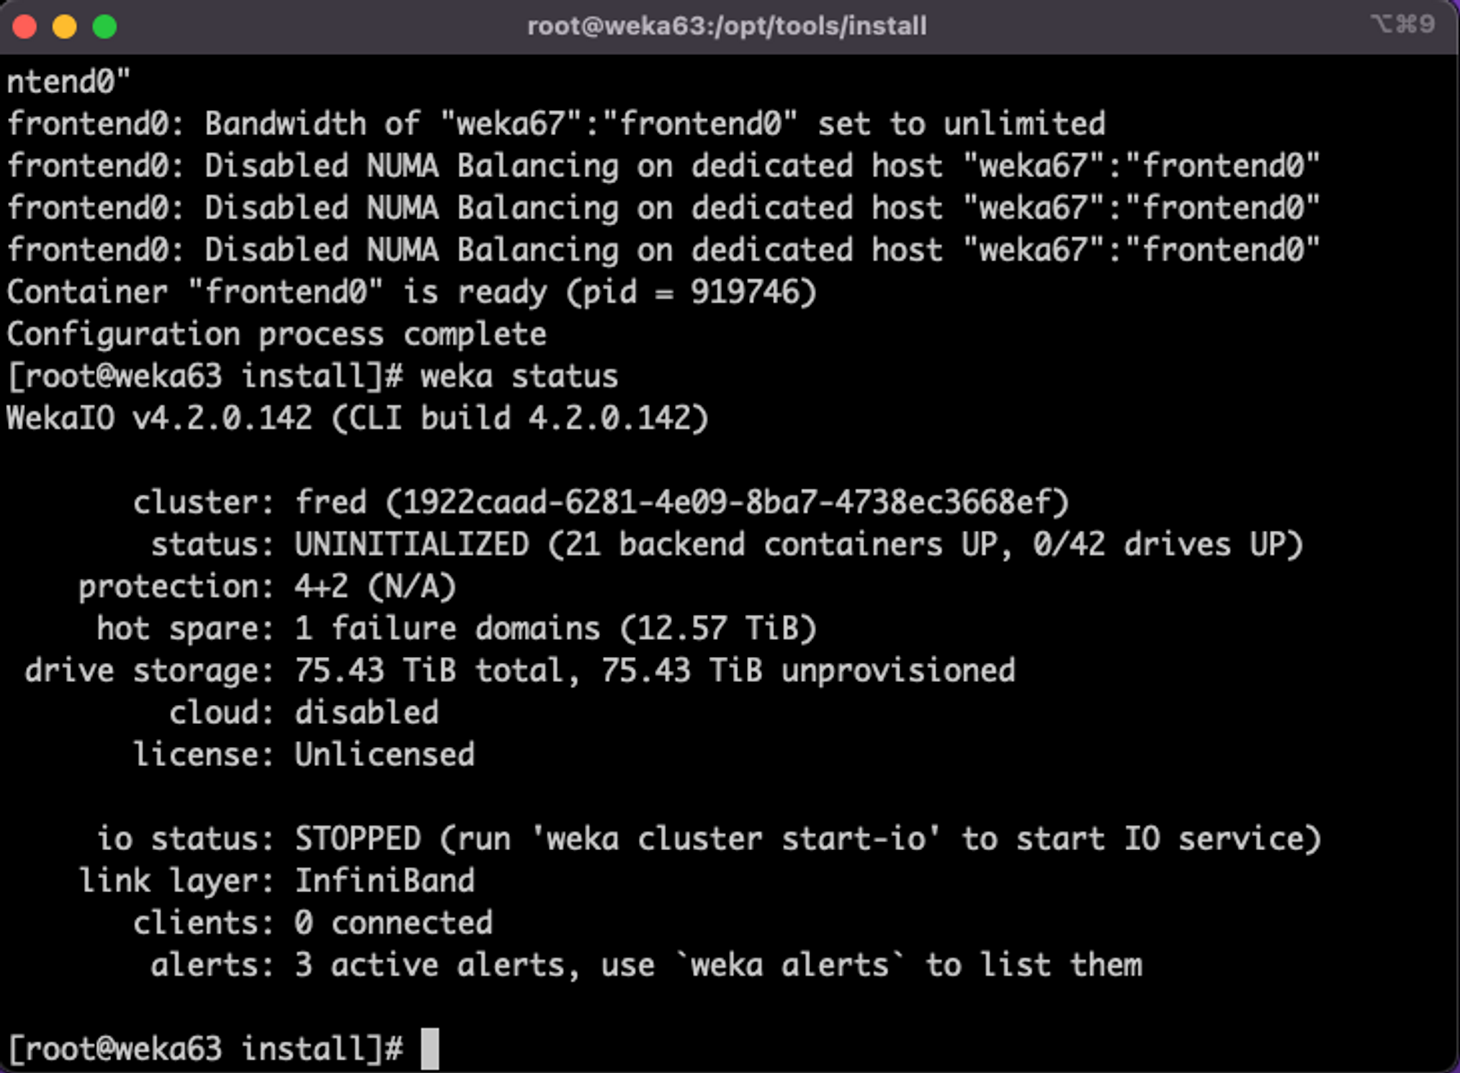
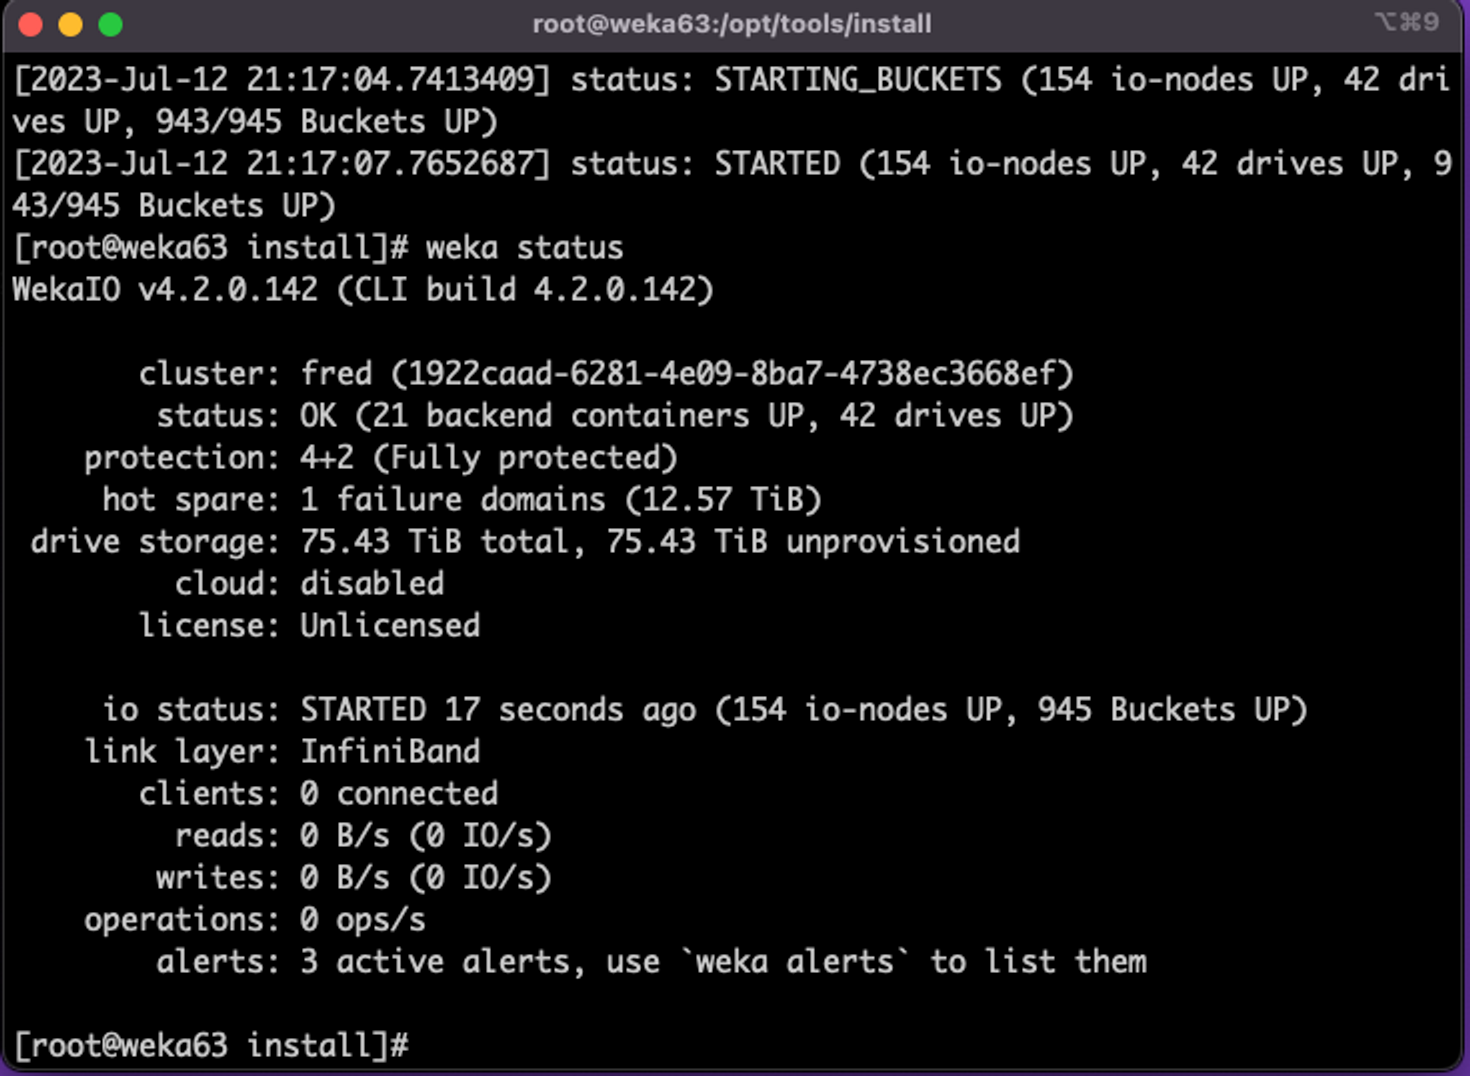
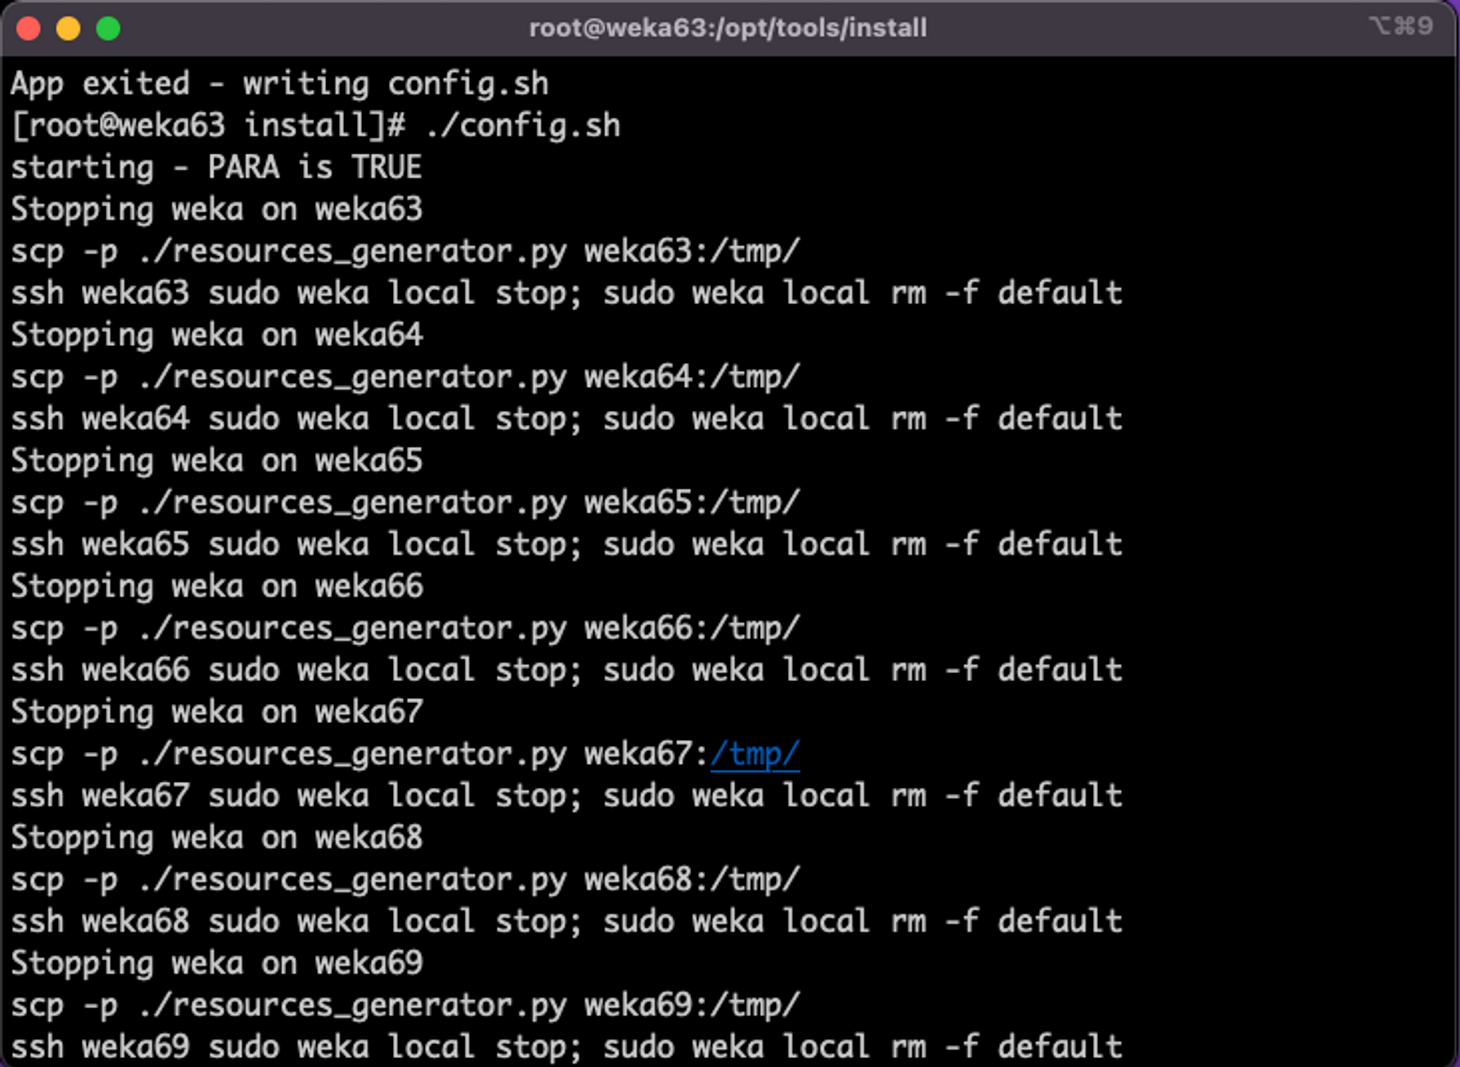
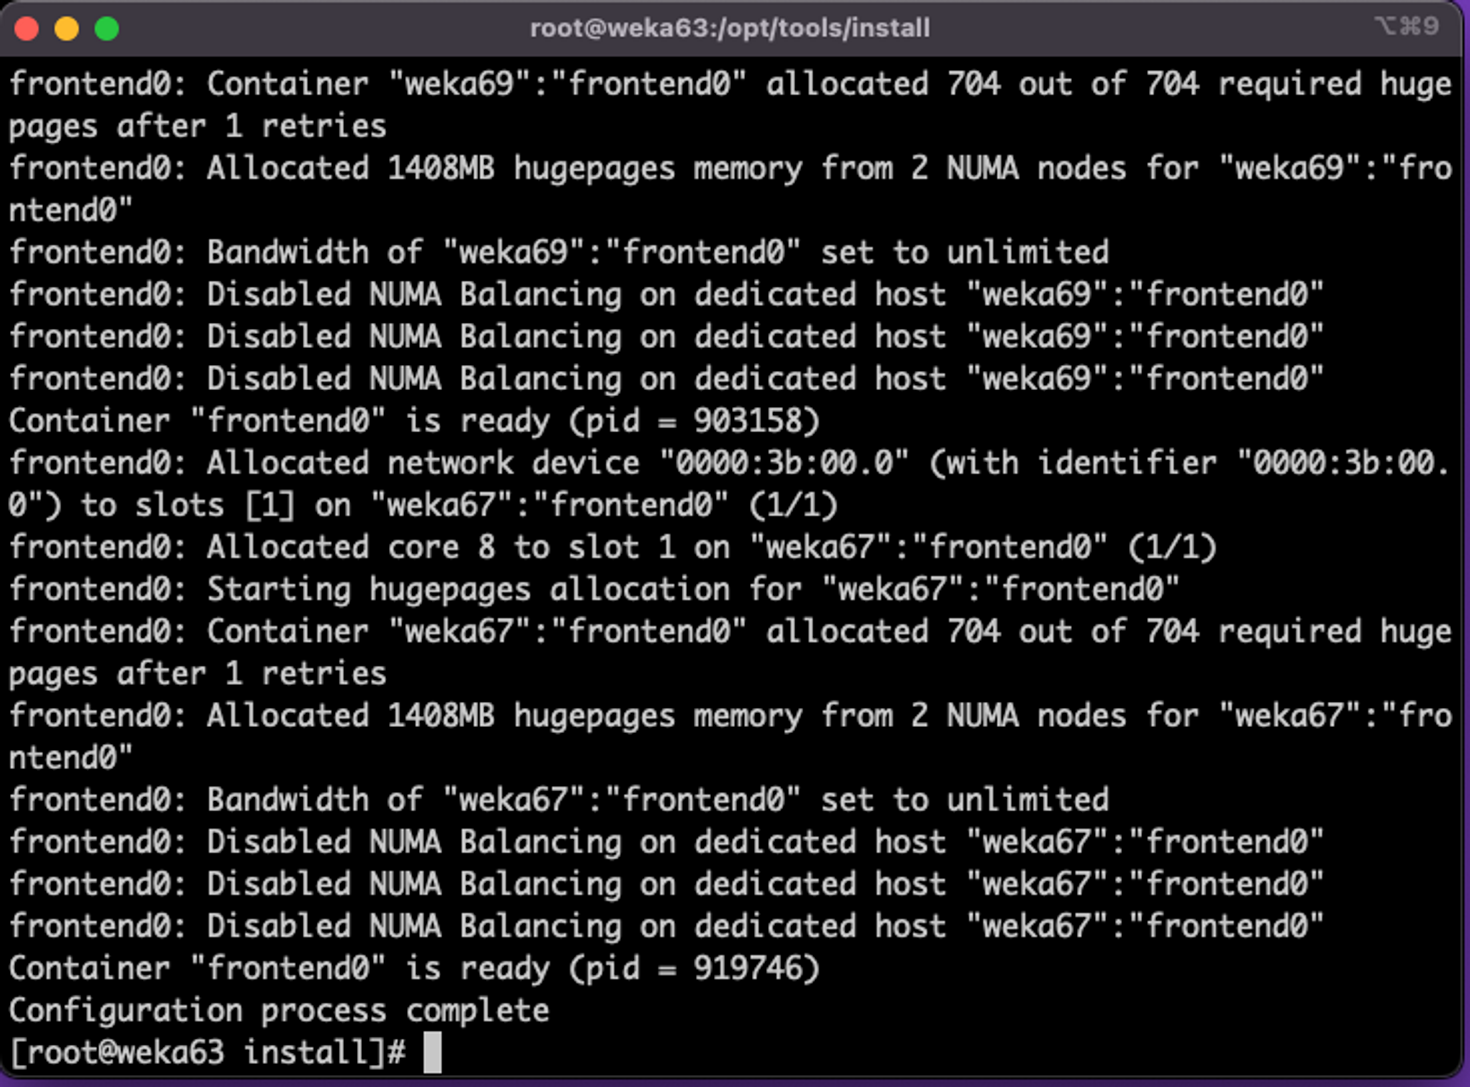
The configuration takes a few minutes and possibly longer for large clusters. See some examples of the configuration process and WEKA status.
What to do next?

Perform post-configuration procedures

PreviousEnable the SR-IOVNextManually configure the WEKA cluster using the resource generator

Last updated 4 months ago

System preparation is validated: Ensure the system preparation is validated using the wekachecker (on WSA installations this is already installed under /opt/weka/tools). See .

The WEKA software is installed on all cluster servers: If not installed using the WSA, follow the instructions in the Install tab of . Once completed, the WEKA software is installed on all the allocated servers and runs in STEM mode.

get.weka.io
11. Validate the system preparation
Example: wekaconfig detection results
Apply the configuration